In the new MAC OS X Leopard operating system, the application bar has a new, sleek look. This tutorial will show you how to create the Glass Shelf Dock used for the operating system.
What We Will Be Creating
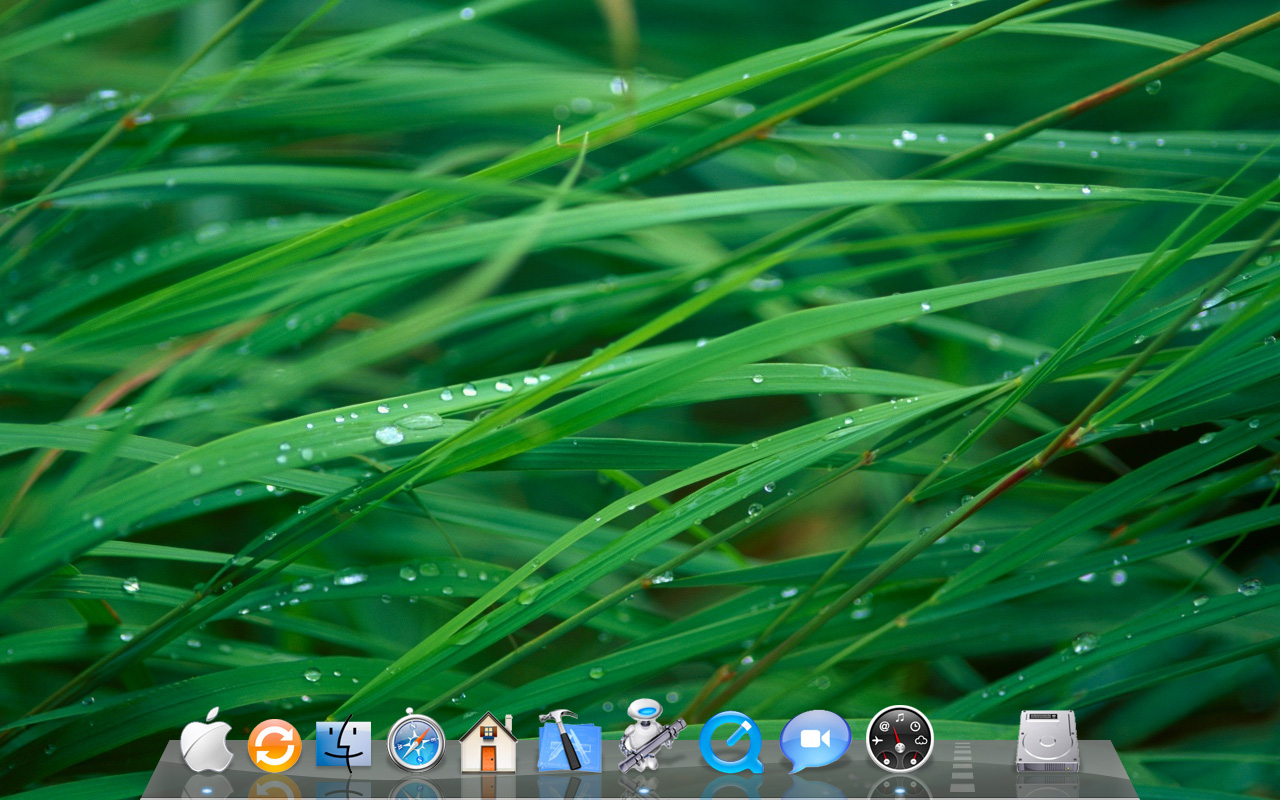
For those of you not aware of what the Leopard operating system looks like, you can see it here. The image below will give you an idea of what we will be creating.

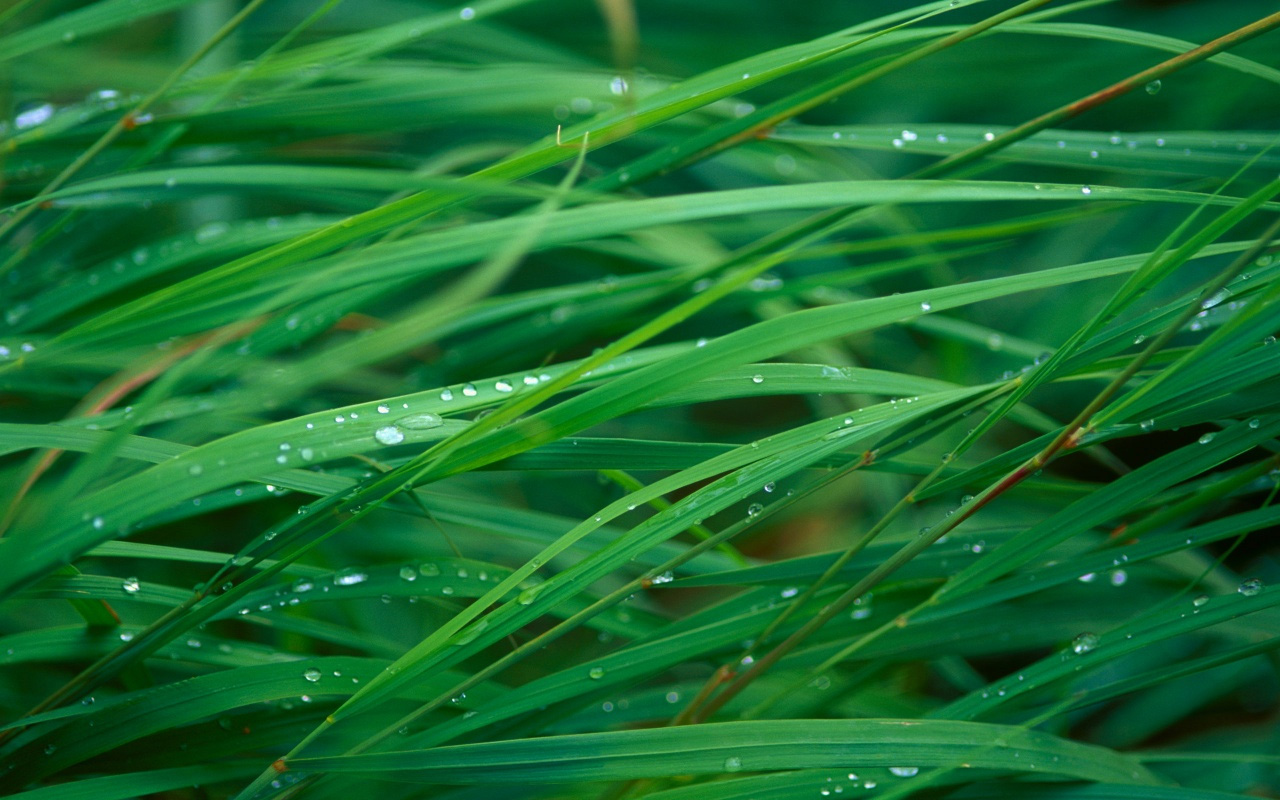
Wallpaper
The background wallpaper we are going to be using is shown below. A larger version can be found here.

Setting the Guides
Now that we have all the materials we need to get started, and we have an idea of what the Glass Shelf Dock looks like, lets begin to create our own inside of Photoshop.
Begin by Creating a New Document (I used a 1280x800px document) and placing the wallpaper into the Background Layer.
Make sure your rulers are enabled. If they aren’t, navigate to View > Rulers(Ctrl+R). Also make sure your guides are enabled at View > Show > Guides(Ctrl+;). Now lets drag guides out from the vertical ruler to 140px and 1140px. Then drag a guide from the horizontal ruler to 760px.

Creating the Shelf
Grab your Rectangular Marquee Selection Tool(M) and select the 1000x60px area in between your guides. Then set your colors as such:
Foreground color #777777
Background color #555555
Create a new layer. Then grab your Linear Gradient Tool and select the “Foreground to Background” preset gradient. While holding shift, drag your cursor from the top of the selection to the bottom.

Create two more vertical guides at 170px and 1110px. Now lets go to Edit > Transform > Perspective and while holding shift, drag the top left corner to your 170px guide.
Perspective Tip
Holding shift will transform both sides of your object at the same time, so that they stay symmetrical.

Adding Effect to the Shelf
Change the opacity of your Shelf Layer to 90% or 80%. Ctrl+Click on the thumbnail for the Shelf Layer to make a selection of it. Create a new layer. Then, grab your Pencil Tool and create a 2px line with the color #cccccc across the bottom of the selection and set the opacity of the layer to 85%. Then, above that, create a 1px line on a new layer with the color #000000 and set the opacity to 25%.

Hiding the Guides
We don’t need the guides that we created anymore, so you can either drag them off the screen or hide them by going to View > Show > Guides
Once again, Ctrl+Click on the thumbnail for the Shelf Layer to make a selection of it. Then, create a Foreground to Transparent Gradient about 30px wide on the left and right side of the selection on a new layer. Change the opacityto 10%.

Creating the Glossy Effect

To add more effect to the shelf, lets add a curved gloss to it. Create a new layer and grab your Pen Tool(P). Make sure that your pen is set to paths.
Pen Tool
Before proceeding, you may want to read the tutorial Pen Tool Basics – Custom Shapes to better understand how to create the shape in the next step, since I will not be explaining how to use the pen tool step by step.
Create a path similar to the highlighted area below. Then, right click while you still have your pen tool selected and clickmake selection. Make sure feather radius is set to 0px.

Grab the Foreground to Transparent Gradient Tool and set your foreground color to #FFFFFF. Then, hold shift and drag the gradient from the bottom of the selection to the top of the selection. You should now have something like below.

Adding Icons
Bring in the first icon that you want to add and place it about halfway up the height of the shelf. Duplicate(Layer > Duplicate Layer…) it and flip it vertically(Edit > Transform > Flip Vertical). Drag it down until the top of the flipped version is touching the bottom of the normal version. Then, change the opacity to 25%.

Adding Shadow
Some people would stop here thinking that the effect is done. However, not only does the actual operating system have shadows for the icons, I would add them even if it didn’t. They help to create more depth and a greater effect.
To add the shadow, duplicate(Layer > Duplicate Layer…) your icon layer and drag the new layer under the original. Fill your layer with black Edit > Fill… Use: Black(Shift+F5). Then change the size of your icon using Edit > Free Transform(Ctrl+T). Drag the top middle box until the top of your icon matches the top of the shelf.
Once you have this accomplished, we need to blur the shadow. Go to Filter > Blur > Gaussian Blur and set the radius to 1.5px. Then change the opacity to 25%.

Repeat this process with more icons

Creating the Fading Rectangles
To create the fading rectangles, follow the same steps we used to create the shelf. Make a white rectangle and transform it using perspective. Delete sections of the rectangle, making them get smaller as they get farther away. Then lower the opacity to 25%.

Creating the Orb
Create an oval 10x4px using the Elliptical Marquee Tool. Then apply the following Layer Styles(Layer > Layer Styles).

The Final Result
We now have all of the objects and effects that we need to complete our design. Lets take a look at the final result.

Creating Something Unique
Experiment with your own styles, colors, and effects to create something that stands out and looks unique. Following a tutorial is one thing, but applying the techniques you learn to something original is on a whole different level.
If you’d like, feel free to grab the Glass Dock PSD
 glass-dock-demo.zip
to get a bet understanding of how I accomplished this look!
'인터넷과 유틸 > photoshop' 카테고리의 다른 글
| Mysterious Lighting Effect Tutorial for Photoshop (0) | 2014.11.03 |
|---|---|
| Easy Photo Grunge Effect (0) | 2014.11.03 |
| Amazing Retro Rainbow Curves (0) | 2014.11.03 |


