This is a tutorial assignment intended to be used by School of Photoshop participants. This guide will test your abilities as a beginner in Photoshop, and show you how to create a simple flyer for an event.
ATTENTION SCHOOL OF PHOTOSHOP VIEWERS: Before viewing this tutorial, you should have completed Pre-School through 8th Grade in our School of Photoshop series, or have a good understanding of the workspace and tools of Photoshop. This lesson will test your abilities, and make sure you are ready for grades 9-12 in the School of Photoshop! We’ll provide links to refresh your memory if you get stuck.
What We’re Making
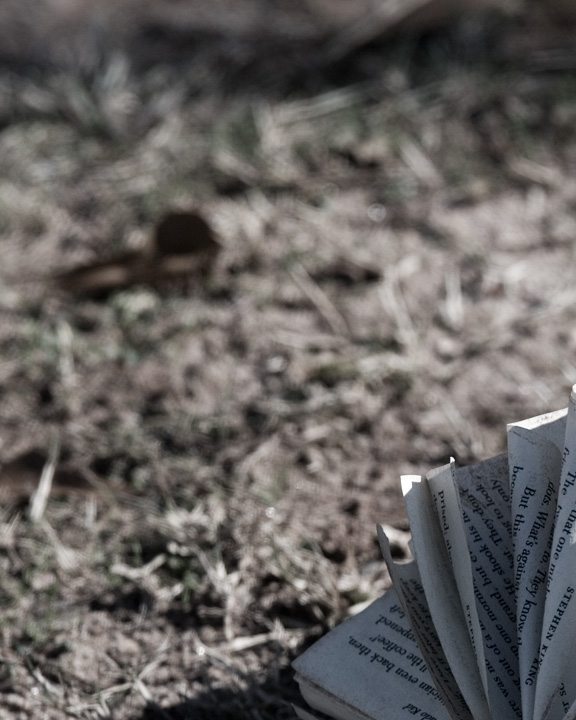
In this tutorial, we will be creating a simple flyer for a fictitious event. This lesson will review skills covered in grades 1-8 of the School of Photoshop. Here’s a quick look at the final product:

Source Materials
This flyer requires that you have one image (which we’ll provide in a moment). Keep in mind that all source materials provided from Tutorial9 may not be redistributed without proper citation (usually, a link near the image will do just fine for websites) just as any other copyrighted work.

Getting Started
To begin, create a new document with the following specifications:
Width: 8 Inches
Height: 10 Inches
Resolution: 72 pixels/inch
Background: White
These specifications certainly would not meet high quality printing requirements, but for our purposes, this will do just fine.
Open the source image provided earlier in this tutorial. Select the entire image (Select > All or Ctrl + A).
Copy the selected image (Edit > Copy or Ctrl + C), and paste (Edit > Paste or Ctrl + V) the contents into your new document. It should automatically paste onto a new layer.

Scale to Fit
Our source image is a bit larger than the active image area in our new document. We need to scale down the image so that it fits the specifications of our flyer.
Use a Scale Transformation to resize the image to approximately the same size as the active image area. Remember,Hold Shift to constrain proportions while applying a scale transformation!

Getting an Exact Fit
Here’s a handy tip that will give you a precise fit when applying a scale transformation. You can actually set the exact dimensions you’d like to scale your selected object to in the Options Bar once you’ve started the transformation fromEdit > Transform > Scale. In our case here, we’d set H to 10in and W to 8in.
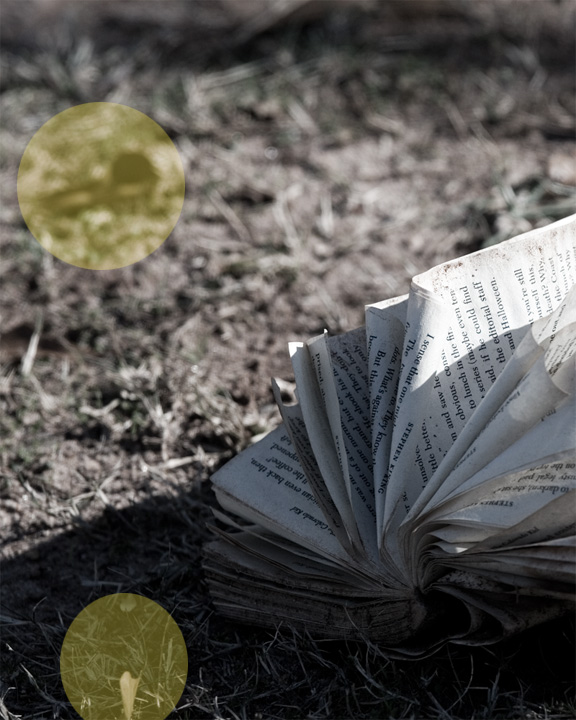
Repairing the Image
There are two parts of this image that I find particularly distracting. One is a leaf in the top left of the photo, while another annoyance in the leaf in the bottom left. Here they are highlighted below:

Now, we could go set this shot up again, and take a new picture without the leaves, but that would take up a lot of our time. Instead, we’ll just repair the image using Photoshop.
Using one of the Retouch or Healing Tools get rid of the highlighted imperfections in your image. I used the patch tool to fix these areas myself.

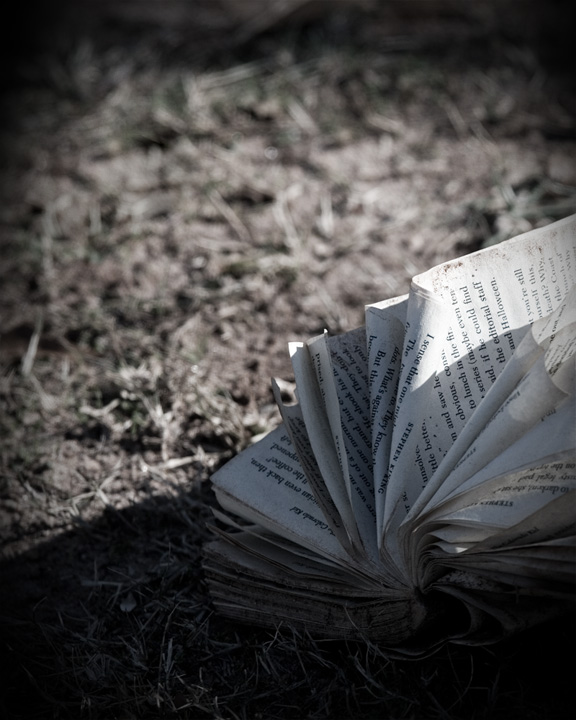
After fixing both imperfections, you ought to have a nice clean photo like the example shown below.

Adding a Vignette Effect
Adding a vignette to a photograph is a really simple way to focus in on something, or just a nice soft way to fade a graphic out. To create our Vignette Effect, we’re going to use the Brush Tool.
Create a New Layer in your flyer document.
Select the Brush Tool from the toolbar, and then pick a large, soft brush tip. Select black as your foreground color.

Using your large, soft, black brush, paint along the edges and corners of your active image area (on your new layer). You may want to zoom out a bit to make this step easier (Ctrl + -). Remember to zoom back in to 100% with Ctrl + “+”.

Adding Type to the Flyer
The next step in our flyer design is adding type to the bottom left corner. We’re going to be working with the type tools to set the text.
This part is pretty straightforward. Create three type layers with some text of your own, or use the example text I’m using. Additionally, adjust your font family, size, and style as you see fit. I’m using the crisp anti-aliasing method, which you might find suitable as well. Be sure to set your text to white.

Creating the Sidebar
Create a New Layer.
Using the Rectangular Marquee Tool, create a selection along the right side of your flyer extending from top to bottom of the active image area. Fill this area with the Paint Bucket Tool (using a black foreground color). Once the selection is filled, Deselect (Select > Deselect or Ctrl + D), and use a large, soft, eraser to fade out the bottom.

Branding the Document
Since this is a fictitious event, sponsored by a fictitious organization, we’re going to use a preset custom shape as our means of branding this flyer.

Use the Custom Shape Tool, and select a preset shape from the options bar. Set your shape somewhere at the top of your sidebar, and make sure that your shapes color is White. You can hold shift to constrain your shapes proportions as your drawing it.
Additionally, let’s add some type going down the right sidebar with the Vertical Type Tool. Choose a new font family, and a size that fits well into the flyer.

Final Brushing
We’re almost done! As a finishing touch to our simple flyer, we’re going to add some nifty leaves in the bottom right corner with the Brush Tool. Photoshop already has a preset that we can use to accomplish this, making it all the easier!
Create a New Layer, and select a Foreground Color of White.
From your Brushes Palette, scroll through your brush presets, and select Scattered Maple Leaves.

In your new layer, create a small splash of leaves in the bottom right corner. It may take you a few tries to create a nice effect (Just use Ctrl + “Z” to undo, or Ctrl + Alt + “Z” to do multiple undo’s). Once you complete this, your flyer is complete!

Congratulations! If you’ve made it this far, that means that you have successfully completed Pre-School through the 8th grade of the School of Photoshop! You’re now ready to begin on grades 9-12!
'인터넷과 유틸 > photoshop' 카테고리의 다른 글
| Quick and Painless Image Vectoring (0) | 2014.11.03 |
|---|---|
| Drawing and Type Tools (0) | 2014.11.03 |
| Photoshop’s Painting Tools (0) | 2014.11.03 |


