This tutorial will show you how to design backgrounds with ease of future adjustments in mind. Applying these techniques in your designs will make color adjustments a breeze, sizing/scaling changes in your background incredibly easy, and give you unprecedented control over how your background looks with very little effort involved.
Backgrounds Made Simpler
Suppose you are working on a graphic for a client (or yourself), where the colors used may be changing on occasion, or perhaps you’d like to experiment with several different colors. One way of going about doing this would be creating several different documents, and for each document, manually adjust the colors, size, and positioning of different elements.
Being the curious folk we are, we wonder, “Shouldn’t their be an easier way to do this?”
As a matter of a fact, there is a much simpler way to work with documents using Shape Layers, Blending Options, and Adjustment Layers. In this tutorial, I’ll demonstrate how you can create very simple backgrounds in Photoshop that can be editing on the fly in a matter of just a few clicks.
What’s the difference?
For purposes of this tutorial, we’ll just be using a simple gradient background. Before you go and grab your Gradient Tool, let’s talk about resizing and scaling.
When you use the Gradient Tool, you are really just performing a one time calculation. The gradient blends between it’s different colors from one point to the next, and after its applied, the data does not change. This is ok in a lot of scenarios, but what happens if we resize our image?
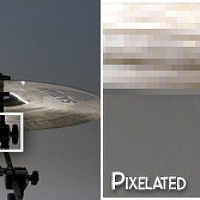
As you can hopefully tell from the image above, the colors are simply being stretched out when we resize an ordinary gradient. Instead of the calculation for the gradient being redone, Photoshop will keep the current data and try to work with it alone.
This is why we want scalable backgrounds. If we resize a graphic, or if we want to reposition and change the scale of the background alone, we want the graphic to appear as smooth as possible. With scalable backgrounds, we can accomplish this.
Getting started
While it’s entirely possible to create a scalable background with any ordinary layer, you’re probably better off usingShape Layers (especially if you’re creating a multi-part background stored in a set of layers).
Let’s begin with a basic document; we’ll be using a plain document, with a layer of “Tutorial9″ text on it. To create your basic background, create a new rectangle shape layer, using the Rectangle Tool. Be sure that you haveShape Layers selected once your working with the Rectangle Tool.
Drag a box around your canvas. This will become your background later on, and can exceed the boundaries of your canvas.
The current background color of the shape hardly matters, as we’ll control it from elsewhere later on, but if you’d like to know how to change a shape layers color, you can easily alter it from the layers panel once you’ve created your shape.
Backgrounds with Blending Options
Right Click on your new shape layer, and select Blending Options.
Select Gradient Overlay. This is the area where we are going to set up our gradient background. There is nothing tricky about this part. Simply set up your gradient however you see fit.
Here is a glance of what I did:
You might be thinking, “All that work for this?”
Sure enough, we could have produced this exact effect with a simple click of the gradient tool, but take a look at what happens when you resize, or reposition the shape layer.
As illustrated in the example above, the layer will recalculate the gradient each time you resize, and will reposition nicely so that you don’t have to recreate backgrounds over and over.
Quickly Adjusting the Background Color
Using Adjustment Layers, we can modify our background on the fly in just a few simple clicks. In order to quickly edit Hue, Saturation, and Lightness, we need to create a newHue/Saturation/Lightness Layer (Layer > New Adjustment Layer > Hue/Saturation/Lightness).
NOTE: Be sure to create this layer above the Shape Layer ONLY! This adjustment layer will effect all underlying layers.
Adjust the sliders presented to accommodate your preferences. Click Ok to save your adjustment. You can return to this adjustment layers settings at any time by double clicking the icon next to it in the Layers Panel.
Conclusion
It’s really simple to set up one of these backgrounds, and they can really improve your work flow if used properly. I’d suggest exploring some of the other adjustment layers, and seeing what helps you save the most time for your kind of work.
You can even use multiple adjustment layers to really control your graphics in an effective manner!
'인터넷과 유틸 > photoshop' 카테고리의 다른 글
| Design an Awesome Product Ad (0) | 2014.11.01 |
|---|---|
| Tip: Use The Grid in Photoshop (0) | 2014.11.01 |
| Enhance Graphics with Easy Depth of Field (0) | 2014.11.01 |


